Thursday, January 22, 2015

Pocket Tissue Holder Tutorial

It has been a crazy hiatus in my life from blogging and sewing, due to deaths in the family (my mom and grandma), the estate of 2 quilters with copious amounts of fabric/sewing supplies/books/etc. then I got married, but then almost divorced (long story), my cat needing surgery for bladder stones, and work changes with new hires (even longer story).

Now . . . I can sort of get back into the swing of things.

I do have some tidbits to share is easy gifts for Christmas/flu season/birthdays/etc. that I stumbled upon, tissue holder.  Buy a bunch of Dollar Store pocket tissues and you have a gift that is cheap, easy, and portable.

For this tutorial, I used a silk tie that I found at a local thrift store for $1, the tie is a Michael Kors silk tie that is retail $69.  Why a tie?  Well, easier to make a man something that is manly, its cheap, and I don't have man prints in my quilting stash.


First step: Take the tie apart, iron & starch it, be careful to not pull or stretch the tie.  Ties are cut on the bias, so its easy to get it misshapen.  Take your time.  I did use starch and it may stain your silk tie.

I managed to get 2 tissue covers from one tie: 2 solid rectangles, pieced 2 of the large rectangles but those can be on the inside.

I used the lining for the contrasting little strips.


Step 2: cutting 2 rectangles that measure 5.5" x 6.5" and 2 strips of 5.5" x 1"

Fold the 1" strips in half lengthwise.  Be careful in ironing, it will stretch on you easily.

I pieced my two smaller pieces to form the big rectangle that you will see in the pictures.


Step 3: Put right sides together on the 5.5" side, and sandwich the 1" strip inside.  The folded side of the 1" strip will be facing towards the middle, all the raw edges will be on the outside.

Use 1/4" seam, use straight stitch.  Don't forget to backstitch on the edges.  The silk fabric will want to fray.  My machine hates slippery stuff, so I have some thread goobers.


Picture to the right: When you open up your seam, you will have the folded 1" strip sticking out.  This is where you will have the finished edge for the tissue holder.


Top stitch
Step 4: Top stitch scant 1/4" from the seam, this will secure the raw edges without needing to do zig zag stitching.

Repeat the opposite side.  You can sew the strips into both sides first before flipping right sides out to do the top stitching.

The picture to the right shows the contrasting trim on the left-hand side and a matching trim on the right-hand side.


Place a pin at the center
Step 5: Now that you have the 2 sides top stitch and right sides out, determine the halfway point along the long side by folding in half and marking with a pin.


Zipper effect
Step 6: Now you must make the decision as to which side you want on the outside and which trim you want showing.  What you want on the INSIDE will be sewn with the fabric showing towards you during these next steps.

The fabric you want shown on the OUTSIDE will be on the inside of the tube.

I like to overlap my trim in the "alley," creating a snug fit, it kind of looks like a zipper.  The alley is pinned down with the center pin on both sides.  Since I want the contrasting trim on the inside, it will be shown while sewing this step.


Trim corners


Step 7: Now sew 1/2" seam with backstitching on the ends and in the middle where the seams meet. Trim the corners to reduce bulk.  


Zig zag edges
FrayCheck helps!
Step 8: Zig zag the edge to prevent fraying.  Since its silk, I also used FrayCheck on the edges.  Be careful when you use FrayCheck, a little bit goes a long ways, plus fabric will absorb moisture, wicking the product.  Also, FrayCheck will create a "wet spot" permanently if your fingertips get wet with the product while handling the fabric.


Placed tissue inside

Finished!

Step 9: Flip the pocket inside out. Use a rounded item to poke out the corners.  Picture on the left shows the contrasting trim on the inside, as the tissues are used, the seam will not be as noticeable.

Add a package of tissues and you are done!  You can keep the tissues in their plastic covers or without.  There is less slipping around when they are out of their plastic covers.


The best part, its something that you can wash!  Well, silk is not suppose to be machine washed but I do it anyways.  After you've been sick, stick it in the wash and reuse.

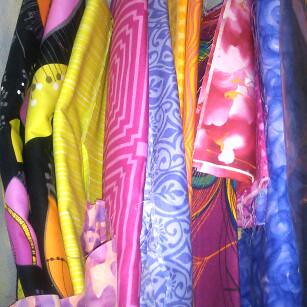
Get creative, use some novelty fabric, neckties and fat quarters sitting around.  I made some kids themed items using Mr. Potato Head fabric, give them away as gifts to teachers.

Have fun and sew on!

Monday, May 6, 2013

Spring has arrived!

As I mentioned in a previous post, I was working on a quilt.  I focused on my purple & lime green project that is inspired by the tutorial from Film In The Fridge.  This is a picture of the process when I was at the coast.
purple & lime project

The block size I decided on was 16" square.  The results turned out amazingly well.
Purple & Lime top


I also selected this project for my March project to "finish" for the Fiber of All Sorts promotion of "A Lovely Year of Finishes" that also has a flickr group.  I have a border idea to go with the project but that is a surprise for later in the year.

APRIL

Then April arrived and I had a special project I had a deadline to complete, my round robin row for Brookquilt.  Her request was saucy colors with a kona black solid.  I LOVE black, I just never buy solids.  Yes, I am one of THOSE weird quilters who never has solids.

Nonetheless, I started with this group of fabrics.
fabric selection
March/April Strip Finished
I also entered this in to the April "finish" project.  I was inspired by a picture in a quilt book, a strata leaf.

2 strata leaves
The result (left) emerged from experimenting with strip piecing, free-form shapes of the leaves, and wonky sewing back together.

Of course you can't waste anything.  I made the remaining blocks from the leftover strips and solid block to create the beautiful row (right).

The prints I used in the middle blocks created a really fun "confetti" like effect.  The print has a large scale and a small scale print of the same mod-like flowers.  The colors were really fun, bright, and up my alley

I really enjoyed making this row.


A preview of what the quilt is starting to look like:
Shelley's quilt

Have a splendid May!!!  More to come!

Friday, March 15, 2013

Bloglovin'

Google is making life difficult for their own reasons . . . so you can also follow with bloglovin' Follow my blog with Bloglovin

Friday, March 8, 2013

35th Birthday Sewing Retreat

It has been one of those crazy years.

My grandma died January 28, 2013 so there is a whole family drama with the siblings not agreeing.

In the meantime, my brother and his 2 kids are moving in with me.

Amongst all of this stuff, I planned on a trip to the Oregon Coast (suppose to be with a travel partner but that did not come about) that included many great things that I missed doing as a kid with my grandparents.

Astoria Column


Day one: traveled to Astoria, that takes about 6 hours from Walla Walla, WA.  Stopped by Multnomah Falls, enjoyed the lack of tourists, and it was not raining for once.  I found a great buy on Groupon for hotel room on the pier at Astoria for $60, included breakfast too.


View from Room
Day two: Weather was overcast with potential rain.  I visited the Astoria column, had a great view of the ships coming in to dock, the bridge, and the valley surrounding Astoria.  Visited the Goonies house, jail, field, etc.


Ft. Clatsop

Boardwalk @ Ft. Clatsop
Next, Fort Clatsop, about 10 miles south of Astoria.  I remember visiting this place with my grandparents but didn't remember the boardwalk or canoe launch.  It's $3 per person, but I managed to get in for free since they guy who had the money was not available, so I made a donation.  The fort burned down a couple of years ago by arson and they rebuilt it, so it looks really new for a historical exhibit.

Haystack Rock
Next, Seaside & Cannon Beach, you know, where Haystack rock is, and the Goonies kids were rescued.  :-)  I love the Goonies!  Anyhow, by this time, it's raining and windy, so I took some pictures from various points near Cannon Beach.  On the weekends, this area is inundated with tourists like you wouldn't believe.  There is no parking for 5 blocks from the Seaside promenade or Haystack Rock.  I wandered my way to find the Cannon Beach Historical Museum, this is a new and free thing to check out.  They had a very well done exhibits that are small, but effective.  The back room is for a rotating exhibit, this month was featuring a local quilter.  I was over the moon!  I also made a donation.  :-)

Cheese Factory
Next stop is Tillamook Cheese Factory to get my lactose on.  The waffle cones are intoxicating!!!  If you go before 3:30pm, you can see actual factory workers wrapping huge blocks of cheese and stuff.  This is definitely a tourist destination, stand in line for hours to try the yummy ice cream and sample some cheese.  I am lactose intolerant so I sampled some cheese, checked out the souvenir shop, and looked around at the quilt blocks outside the building.  Tillamook has these large quilt blocks painted on buildings around town, it was nice.  I visited a bright pink fabric store that was too overpriced for fabric that I know are not current.  *sigh*  I did spend $1.80 on a fat quarter of quilters lame.  :-)

Finally, I made my way to Lincoln City, my final destination for the next few days.  I pretty much unloaded, had some wine, and crashed.

Jellyfish
Day three: Visited the Lincoln City Cultural Arts Center and Farmer's Market which I bought some yummy chipotle peanut brittle and then I visited the tide pools & enjoyed the sunset.  Since the tourists were gone, the heated pool was all mine!  I started working on my purple & lime green quilting project.  I do not have cable at home but super excited to get caught up on the "Walking Dead."


Shark Tunnel
Day four: Happy Birthday to me!!!  Travelled to the Newport Aquarium for my free admission, souvenir pennies, and free souvenir picture.  Best birthday experience I've had in a long time.  The new feature for me is the shark tunnel.  I even touched some weird stuff in the kids petting pool.


Sea Otter
Next door is the Rogue Brewery!  I sampled some dark beers and the bartender gave me a free tasting on the house too.  Of course, all the ones I liked are not available in bottles for them to sell to me.  Boooooo!  I highly recommend the double chocolate stout!
Beer Sampler


Now it's about lunch time, I visited the Devil's Punchbowl and had a nice lunch in the sun.

Devil's Punchbowl


Next, visit the Tanger Outlet Mall.  I manged to get a whole outfit for $10.  Score!  By the time I made it back to the condo, it was starting to cloud up and no fancy sunset.  No tourists at the heat pool again!  I sewed some more on my purple & lime quilt.  I also started packing some items for tomorrow's departure.

Day five: travelled back to Walla Walla, pretty uneventful.  A friend of mine was in town for work and we hanged out.  My brother and the two kids moved in and enjoyed some sick kids.

Best picture!


Wednesday, February 27, 2013

Working on Shanna's Strip

With the holiday season making people crazy, stressed, and tipsy, our Stripper group is delayed by a month.  Which means, I will procrastinate a month.  Yes, I am one of THOSE people.

While I was at Shanna's for a quilting day, I got her approval for the fabric selection.  She wanted grey, white, brown, navy, mustard, and lemon.  I don't buy solids so she gets to have a light grey backgrounds!
Fabric Selection

I apparently do not have mustard yellow in my stash at all.  My LQS helped me find this grand houndstooth and they were also having a sale.  Yay!  There is also some Joel Dewberry, Amy Butler, Sweetwater . . . They are looking good together.  I have no clue where the pots are from, I've had them for awhile (over 5 years).

3 cupcake blocks
3 Cupcakes

"Cupcake" block
Block #1 -- Cupcake


My first 3 blocks were called "cupcake" from a book about pieced borders.  There were no instructions so I am surprised I did 3 of these.


Shanna's Stripper Block 2
Freshly Pieced original block
Last block
Has pinwheel center


Plus, to make the strip not look so generic, I pieced 2 more blocks titled, "Mosaic" from Freshly Pieced blog.  I changed the yellow and it went well with the other blocks.  I arranged one a little different to create a pinwheel in the center.


Put all five of the 12.5" blocks together with the other 2 strips, and its looking like this (mine is the bottom row):
3 strips

Monday, January 28, 2013

Table Runners Galore!

Nothing like trying to figure out what to make for people than to do it with a deadline!  I tried this quilt block awhile ago, I was not jazzed about the effect with Mary Englebreit prints that I had.

I was in Baker City, OR for Thanksgiving with a specific fabric in mind, snowflakes.  These snowflakes were the ANSWER!  Actually, this table runner is for a friend who has a birthday on January 3, and she's not a girly girl.  Using Ryan Walsh's tutorial, I made this lovely holiday inspired table runner for Sarah.
Holiday Ribbon Tablerunner

Here is a close up of the quilting and binding on the finished project:
Finished Table runner


This was soooooo easy, a 1 hour project from start to finish, that I had to make another one!
Coffee Ribbons Tablerunner
This is currently not finished.  I am experimenting with free-motion quilting . . . and its not for anyone in particular at the moment.

Then I had a great idea to make one for my Grandma.  She loves chickens.  I found some fat quarters at Craft Warehouse and made this table runner in one weekend so I can give her something for Christmas, which she celebrates but I don't.
Chicken Table Runner

A Year of Finishes

Why not add another flickr group to my plate!

A friend of mine, Shanna, is a hard core blogger compared to me.  She is working on this whole project with Melissa.  You can join in too!

My January project is to finish my Batik Stripper Quilt top.  I sewn this part at Shanna's house on Dec. 29th, I decided to do a 45 degree sewing between each strip, the hardest part was making sure the angle was going the same direction on one long strip, but not every row is going the same direction.
Batik Stripper Quilt

I used about 40 batik 2.5" strips from a shop-hop collection that I gathered in 2011, it maybe covered half of my queen bed.  I estimated that I needed to cut another 40.  I am amazed I have 40 different batiks to add to this!  I didn't even get into my purple drawer!

I spent one night cutting, about 2-3 hours.  Another night sewing some together, another 2 hours.  Then another night sewing the rest and iron to see how big this is and it's FINISHED!

Batik Stripper Quilt

This could easily be a weekend quilt project.  I did not follow any pattern, it is all straight sewing.  It is a very nice way of using up scraps or jelly rolls that you have no clue what to make.  You can google "Jelly Roll Race" and see the different variations to this very simple idea.

Have fun and keep quilting!

Thursday, January 10, 2013

Stripper Project -- Over the Rainbow

This is an ongoing project which group members have 2 months to make a strip of blocks that follows a theme of some sort, then pass on to the next person, and so forth.  The ending project resulting in a quilt make with LOVE, creativity, and hopefully, a size that is desired.

My first project is Melissa's Rainbow strip.  She had an amazing group of different colors with solid white background.

My first idea, learn a new technique!  ha ha!  I used Judy Sisneros' book "Rectangle Pizzazz" and a lot of pins.  It turned out really well.  Using only one 6" strip of a variegated rainbow fabric and one 6" strip of solid white fabric produced this:
Rainbow Curves

Then I read Melissa's request, she wants the strip to be about 14" tall . . . so I had to stack these and trim the white down.  Nonetheless, I did a second strip and put it all together for this effect:
Rainbow Curves 2

Then I read Melissa's request again . . . a minor detail, she wants a "goose" in each block.  Well.  Can't make the whole strip of just this!  I would not be following the rules.  *sigh*  So I had another grand plan, add actual quilt blocks on the ends with the flying geese.

First block is a free-form paper pieced flying geese in rainbow prints, with a dash print background for this:
Flock of geese

Then I did a combination block of the curves and flying geese leftovers for the other side, shown here in the upper right corner:
rainbow stripper #3

All together, this strip with Melissa's looks like this:
rainbow stripper #2
If I had a wall big enough, the picture would of turn out better, showing the full effect of the rainbow.

The flying geese blocked changed a little as well, I added more fabric so it can be trimmed down but also so it will be as long as Melissa's strip (upper left)
rainbow stripper